Apple Pay Shortcuts
Set up Apple Pay automation for SmartBudget.
Create a Shortcuts automation on your iPhone so Apple Pay payments can create expenses automatically in SmartBudget. This helps you track spending without entering every purchase manually.
Setup guide
Follow the steps in order.
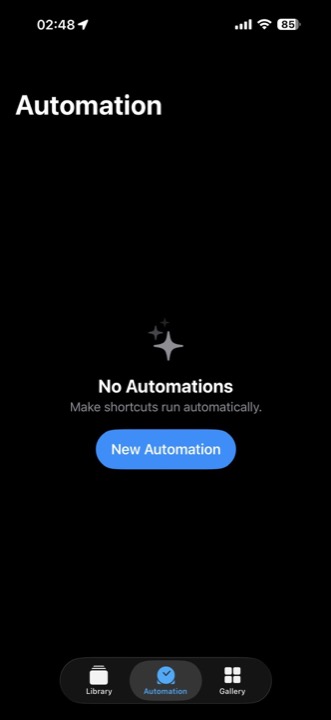
Step 1 Open Shortcuts and start a new automation Use the same iPhone where SmartBudget is installed. Open the Shortcuts app, tap Automation at the bottom, then tap New Automation.
If you cannot find Shortcuts, search for it from your iPhone Home Screen.
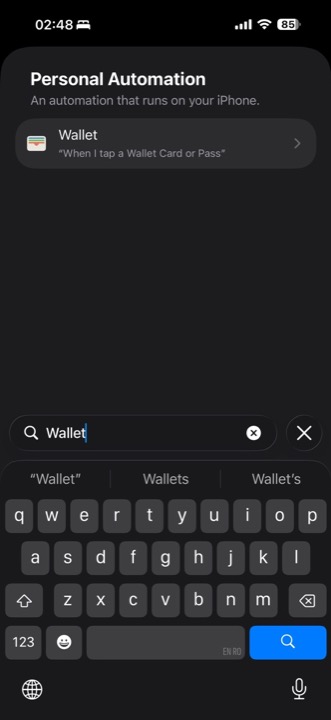
Step 2 Choose Wallet as the trigger On the Personal Automation screen, tap the Search field, type Wallet, then select Wallet.
Choose the Wallet option that says "When I tap a Wallet Card or Pass".
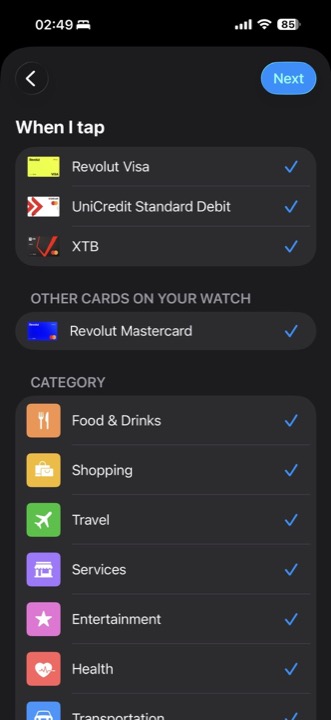
Step 3 Select the cards that create SmartBudget expenses Select the Apple Pay cards that should create an expense in SmartBudget each time you pay with them on this iPhone. Tap Next.
You can select one card or multiple cards. Only payments made with the selected cards on this device can trigger the automation.
Step 4 Create a new shortcut action Tap Create New Shortcut.
This lets you add the SmartBudget action that creates the expense.
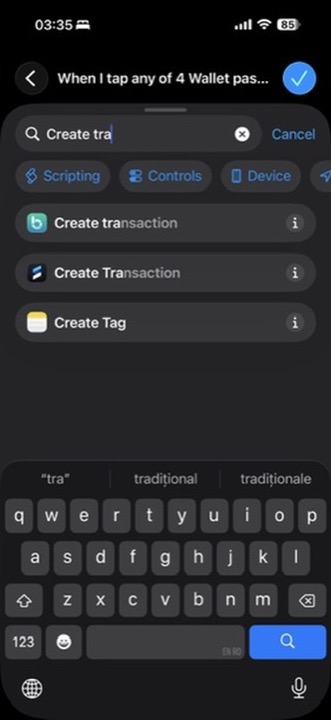
Step 5 Select Create Transaction Search for Create Transaction, then select Create Transaction with the SmartBudget icon.
If more than one Create Transaction action appears, choose the one with the SmartBudget app icon.
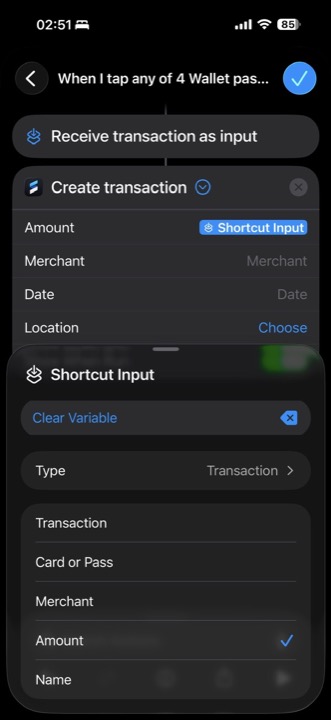
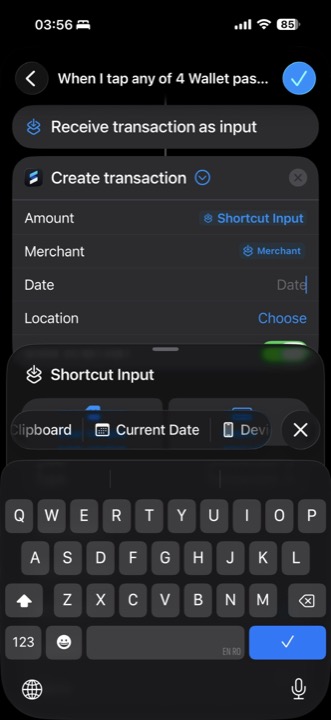
Step 6 Set Amount to Shortcut Input Tap the blue chevron next to Create Transaction to expand the fields. Tap Amount, then choose Shortcut Input from the variable suggestions.
Shortcut Input is usually the last option in the variable suggestions.

Step 7 Choose Amount from Shortcut Input Tap the Shortcut Input value you just added next to Amount. In the panel that appears, select Amount from the list.
After selecting Amount, the Amount field may still display Shortcut Input. That is OK.
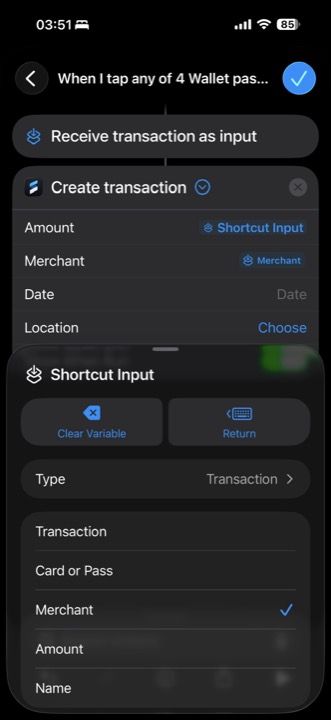
Step 8 Set Merchant to Merchant Tap Merchant, choose Shortcut Input, then tap the new Shortcut Input value and select Merchant from the list.
The Merchant field should show Merchant after this. It is still OK if the Amount field shows Shortcut Input.
Step 9 Set Date to Current Date Tap the Date field, then select Current Date from the variable suggestions.
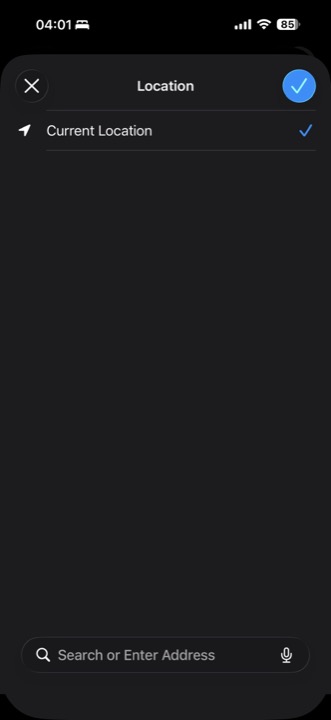
Step 10 Set Location and save the shortcut Tap the Location field and select Current Location, then press the top-right checkmark. Turn on Show When Run, then press the top-right checkmark again to save.
Show When Run lets you see when the automation is triggered after paying with your card.